Node.js + MySQL 部署 Heroku
前言
繼 上一篇 用 Node.js 打造 The F2E - ChatRoom,大家寫完專案後,一定迫不及待的想丟上平台試試看對吧!在前端的免費空間,大家比較常使用 GitHub,但在後端比較常聽到的是 Heroku,目前支援以下這些語言。而本篇主要介紹 Node.js 搭配 MySQL 與 Git 上傳。

本篇目錄
環境建置
- 註冊
- 安裝 Heroku Cli
- 登入 Heroku
部署
- Git Ignore
- 創建 Git
- 新增/連結APP
- 部署 Heroku
MySQL 配置
Session Store
報錯處理
環境建置
註冊
首先我們先進到 官網 點選註冊 (Sign up)
填入名字及郵件等等資訊
等待 Heroku 寄驗證信到信箱後,點選連結並連到輸入密碼頁面
完成

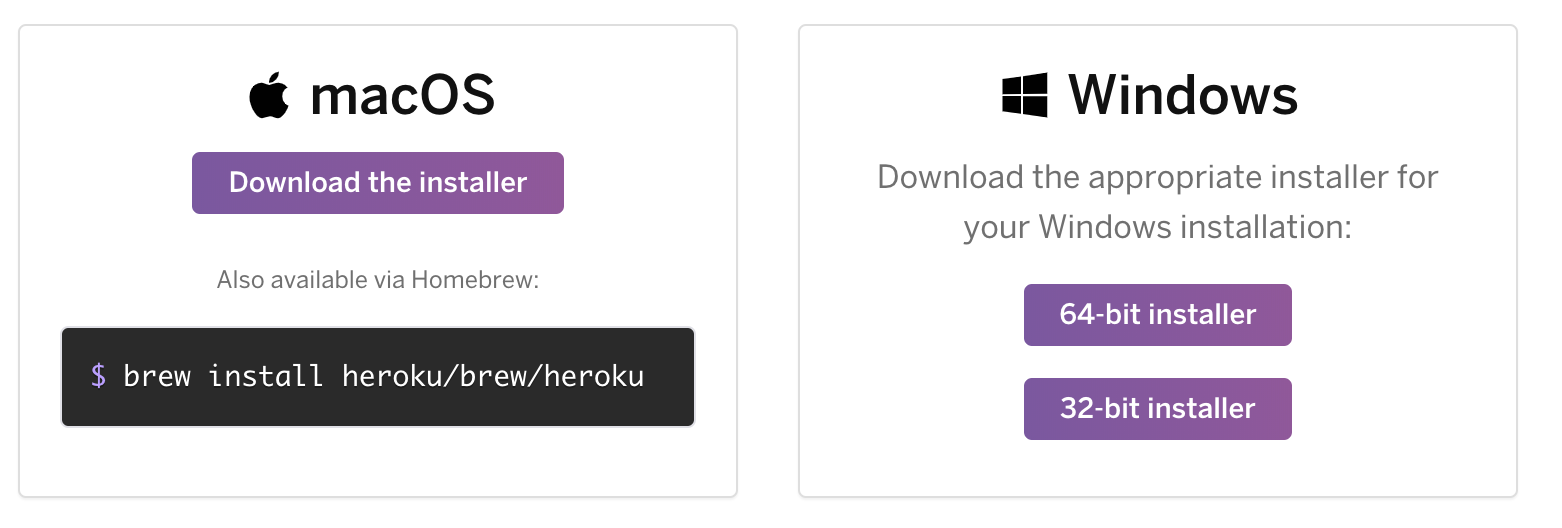
安裝 Heroku cli
之後我們都會用到 Heroku cli 此介面,先附上 下載頁面 。連結進去後,根據你的系統安裝合適版本。
另外,我們會搭配 Git 做專案上傳,Git 安裝可以參考 此處 ,
關於 Git 版本控制可以參考高見龍大大的 Git 教學 。
為了確保之後可以順利運行,我們還需要 Node 版本 8 以上以及 npm,可以使用以下指令查詢是否安裝過。
$ node --version
v10.16.1

$ npm --version
6.12.0
登入 Heroku
以上環境建置都完成後,我們可以在終端機輸入:
$ heroku login

heroku: Press any key to open up the browser to login or q to exit:
Opening browser to https://cli-auth.heroku.com/auth/browser/xxx
Logging in... done
Logged in as [email protected]
此時會開啟 Heroku 登入頁面,輸入帳號密碼登入就 OK 了!
部署
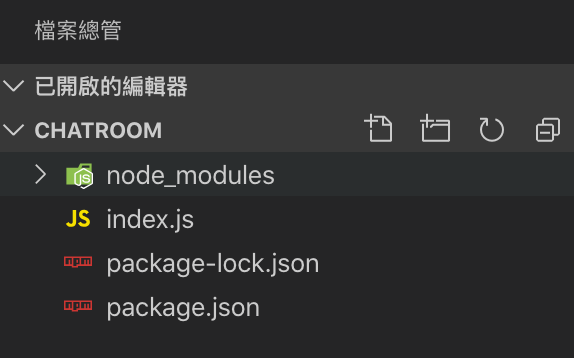
我們會以上一篇聊天室專案做範例,專案資料夾目前長這樣:
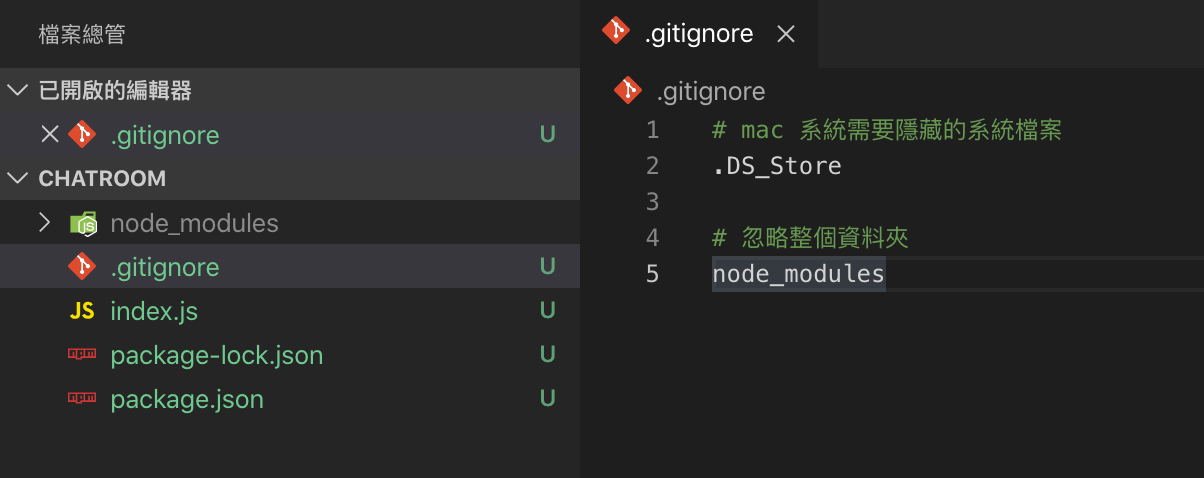
Git Ignore
在 Git 上傳前需要做的一件重大事。
專案裡有個 node_modules 資料夾是不需要上傳的,因為他容量較大,一般來說 Heroku 會自動根據 package.json 檔去安裝所需套件。因此我們需要先創建好 .gitignore 檔案並新增忽略規則。
創建 Git
再來為專案創建 Git 版本控制:
// 進到專案資料夾
$ cd chatroom

$ git init
$ git add .
$ git commit -m 'first commit'
新增/連結APP
新增 Heroku APP,如後面不帶名稱 Heroku 會自己給予 APP 隨機名字。
$ heroku create [app-name]

Creating ⬢ thef2e-chatroom... done
https://thef2e-chatroom.herokuapp.com/ |
https://git.heroku.com/thef2e-chatroom.git
注意,如果要跟改專案名字的話,在官網上的 setting 改完他的兩個網址並不會做變更,因此輸入以下指令是比較保險的!
$ heroku apps:rename --app [old-name] [new-name]現在,我們得到了 APP 網址以及 Git 資料庫網址。我們使用 Heroku 指令把本地的專案與遠端做連結:
$ heroku git:remote -a [app-name]

// 查看
$ git remote -v
heroku git.heroku.com/thef2e-chatroom.git (fetch)
heroku git.heroku.com/thef2e-chatroom.git (push)
部署 Heroku
連結後 push 到遠端上:
$ git push heroku master

Enumerating objects: 6, done.
Counting objects: 100% (6/6), done.
Delta compression using up to 4 threads
Compressing objects: 100% (6/6), done.
Writing objects: 100% (6/6), 10.87 KiB | 5.44 MiB/s, done.
Total 6 (delta 0), reused 0 (delta 0)
remote: Compressing source files... done.
remote: Building source:
remote:
remote: -----> Node.js app detected
remote:
remote: -----> Creating runtime environment
remote:
remote:        NPM_CONFIG_LOGLEVEL=error
remote:        NODE_ENV=production
remote:        NODE_MODULES_CACHE=true
remote:        NODE_VERBOSE=false
remote:
remote: -----> Installing binaries
remote:        engines.node (package.json):  unspecified
remote:        engines.npm (package.json):   unspecified (use default)
remote:
remote:        Resolving node version 12.x...
remote:        Downloading and installing node 12.13.0...
remote:        Using default npm version: 6.12.0
remote:
remote: -----> Installing dependencies
remote:        Installing node modules (package.json + package-lock)
remote:        added 123 packages from 102 contributors and audited 239 packages in 3.359s
remote:        found 0 vulnerabilities
remote:
remote:
remote: -----> Build
remote:
remote: -----> Pruning devDependencies
remote:        audited 239 packages in 1.408s
remote:        found 0 vulnerabilities
remote:
remote:
remote: -----> Caching build
remote:        - node_modules
remote:
remote: -----> Build succeeded!
remote:  !     This app may not specify any way to start a node process
remote:        https://devcenter.heroku.com/articles/nodejs-support#default-web-process-type
remote:
remote: -----> Discovering process types
remote:        Procfile declares types     -> (none)
remote:        Default types for buildpack -> web
remote:
remote: -----> Compressing...
remote:        Done: 23.1M
remote: -----> Launching...
remote:        Released v3
remote:        https://thef2e-chatroom.herokuapp.com/ deployed to Heroku
remote:
remote: Verifying deploy... done.
To https://git.heroku.com/thef2e-chatroom.git
 * [new branch]      master -> master
如果你是照著我聊天室步驟建立專案的話,會發現終端機有一行顯示驚嘆號,那是因為 Heroku 需要一行 Start 指令去建置專案,而我們的 package.json 檔內並沒有明確指令才報錯。
因此我們需要在 JSON 檔內多新增一行 start,並重新 push 一次,Heroku 就可以成功建置環境了。
"scripts": {
    "test": "echo \"Error: no test specified\" && exit 1",
    "start": "node index.js"
},
MySQL 配置
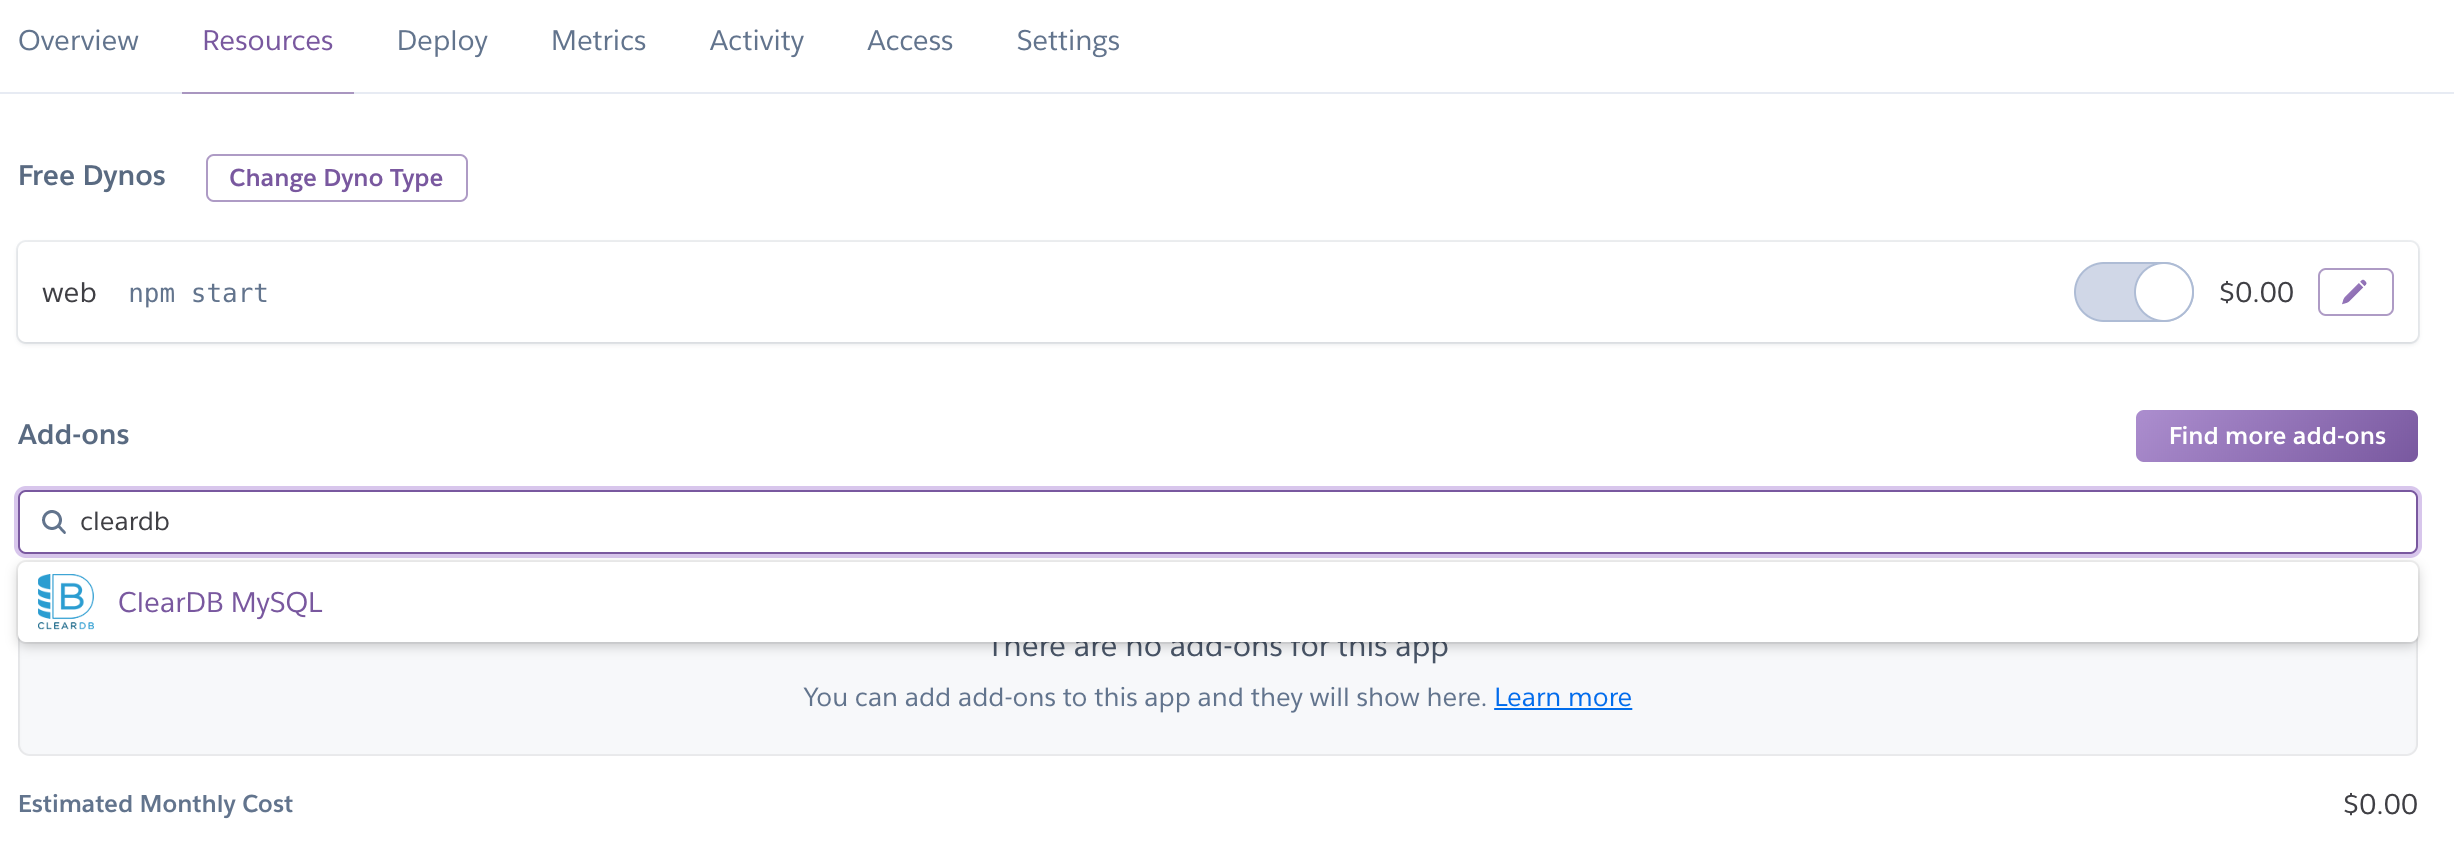
接著我們來到第二大關,要準備把本地端資料庫也 push 上去,這次使用的服務是 ClearDB。
我們要先為專案新增一個 Add-ons:
$ heroku addons:create cleardb:ignite

Creating cleardb:ignite on ⬢ thef2e-chatroom... free
Created cleardb-octagonal-43734 as CLEARDB_DATABASE_URL
Use heroku addons:docs cleardb to view documentation
也可以在 Heroku 網站做新增:
透過以下指令,我們可以得知 ClearDB 資料庫配置:
$ heroku config | grep CLEARDB_DATABASE_URL
CLEARDB_DATABASE_URL:mysql://be6c96a165xxx0:[email protected]/heroku_e8d000339887xxx?reconnect=true
// 補充
// username: be6c96a16xxxd
// password: c504fxxx
// host: us-cdbr-iron-east-05.cleardb.net
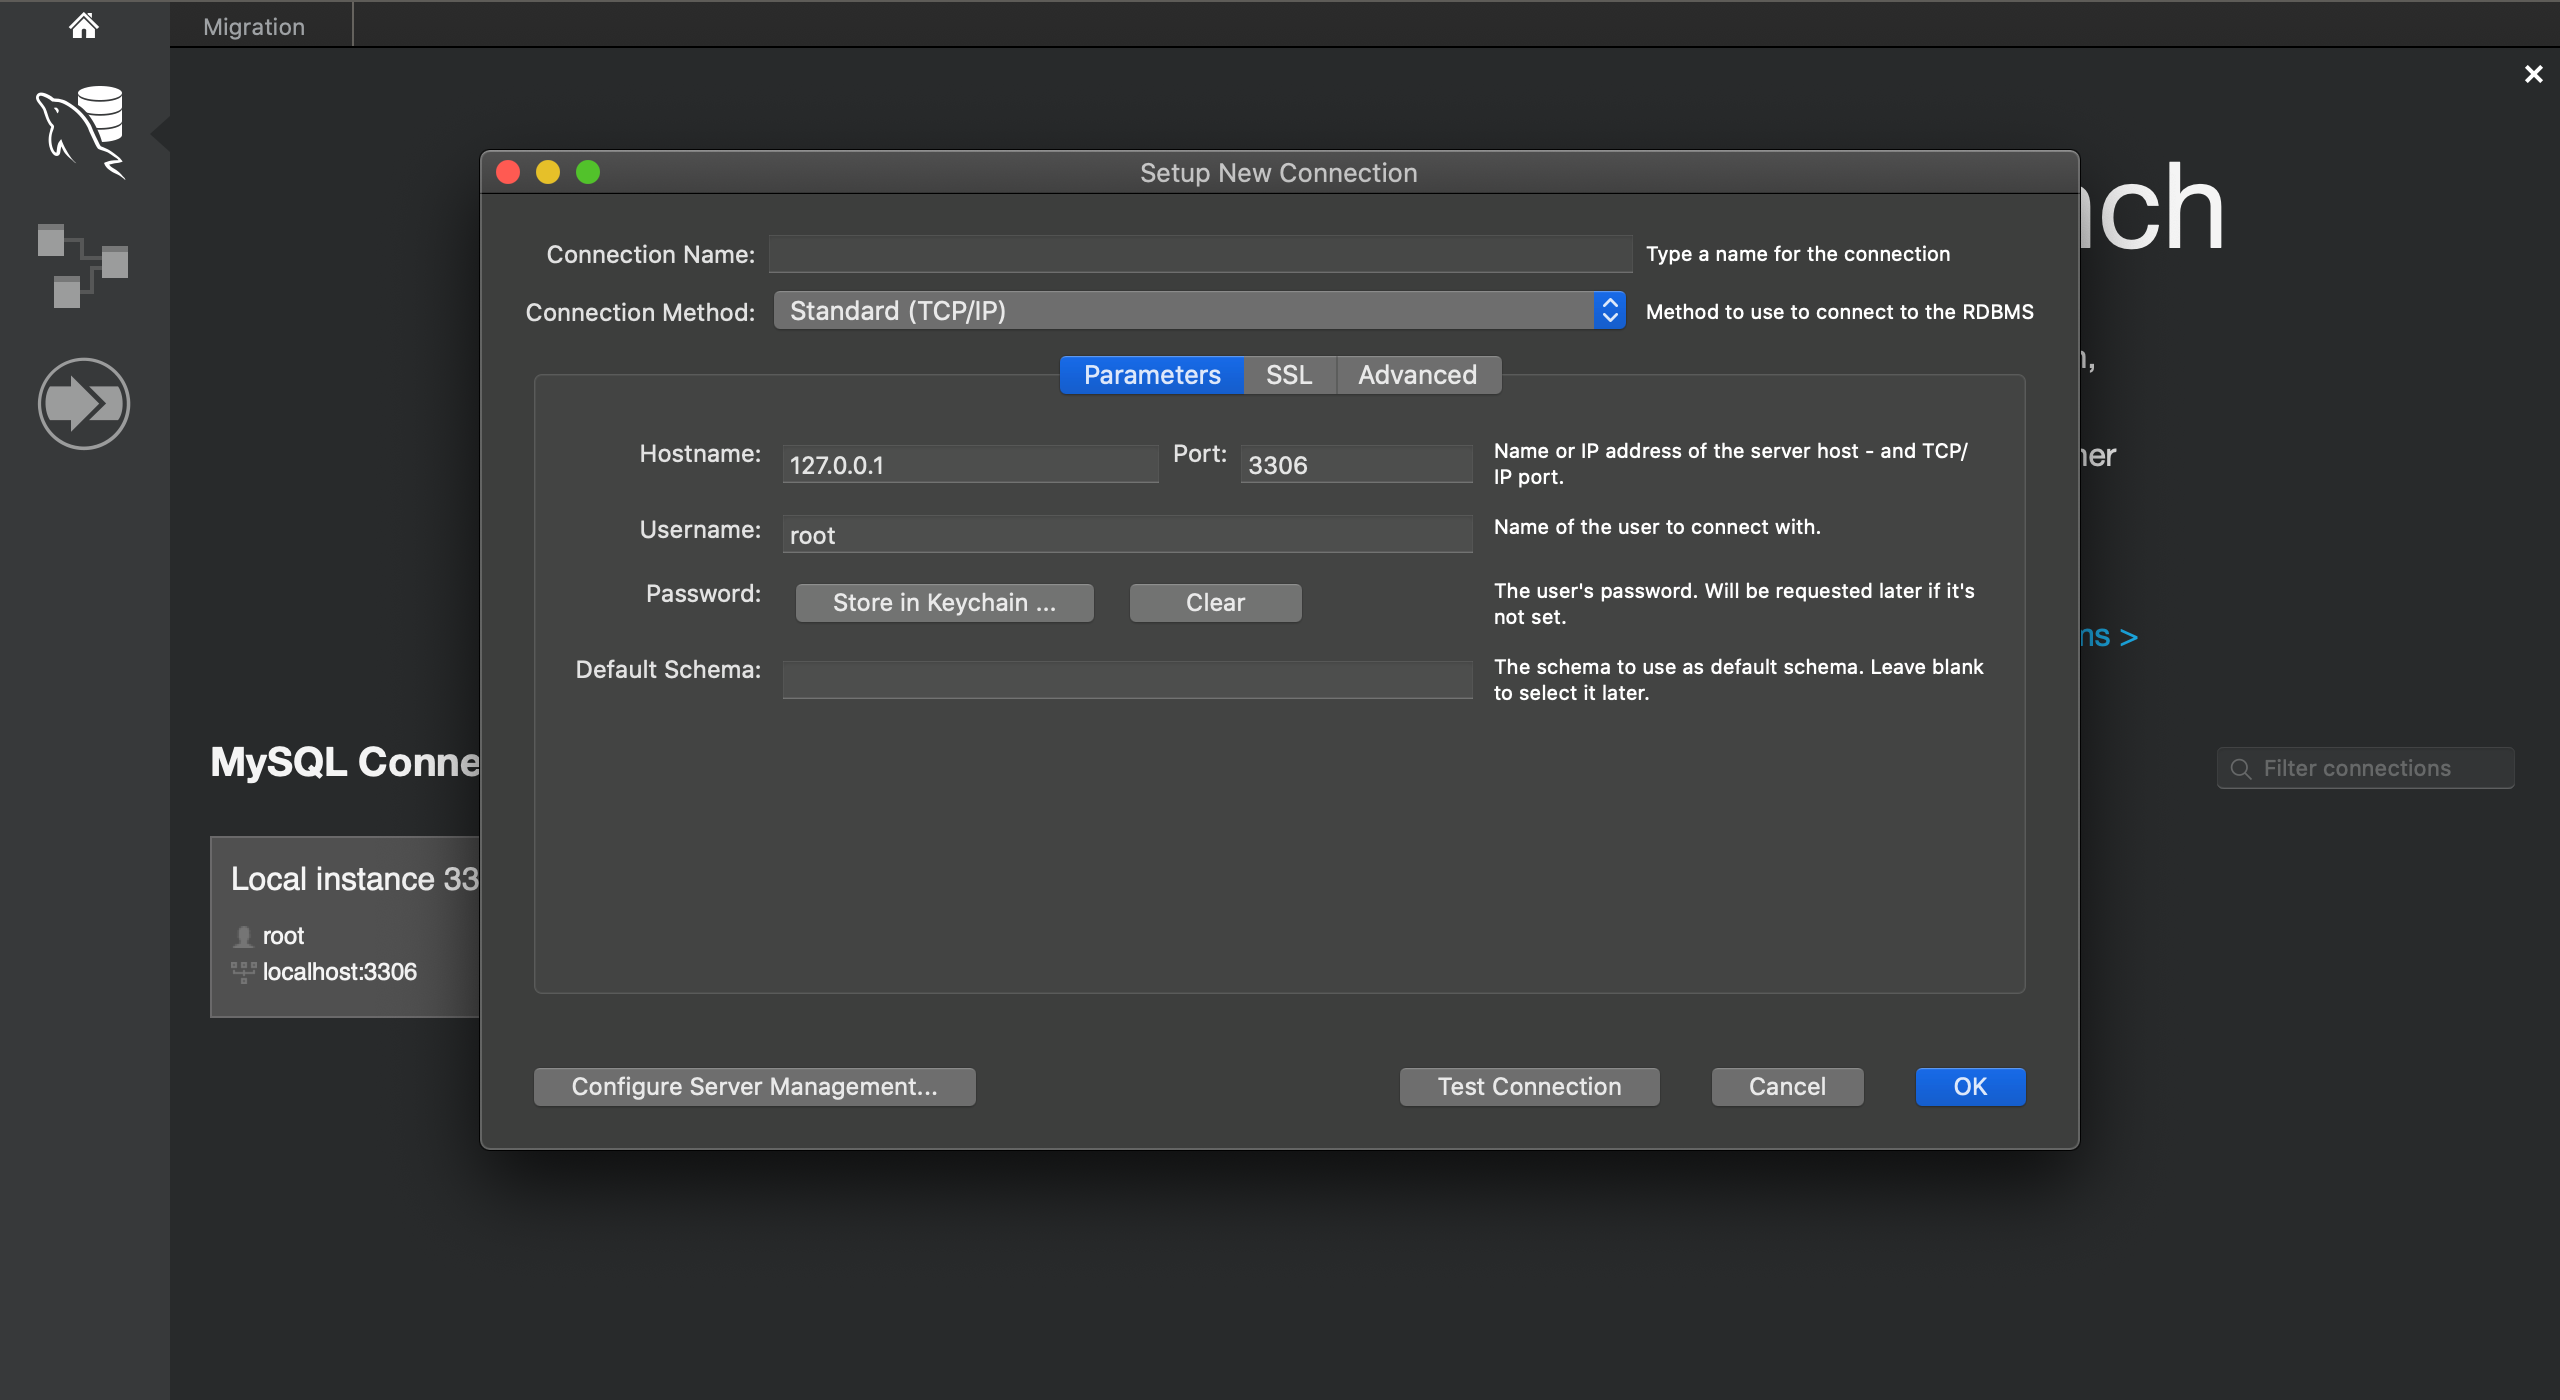
// database: heroku_e8d000339887xxx接著打開 MySQL Workbench,並新增新的連線就可以和剛剛新增的資料庫做連結,再把本地端的 database 輸出,引入到遠端資料庫就 OK 了!
對了,因為新增了遠端的資料庫,因此我們原本程式碼內連結的本地端資料庫,也須要換成遠端資料庫哦!
Session Store
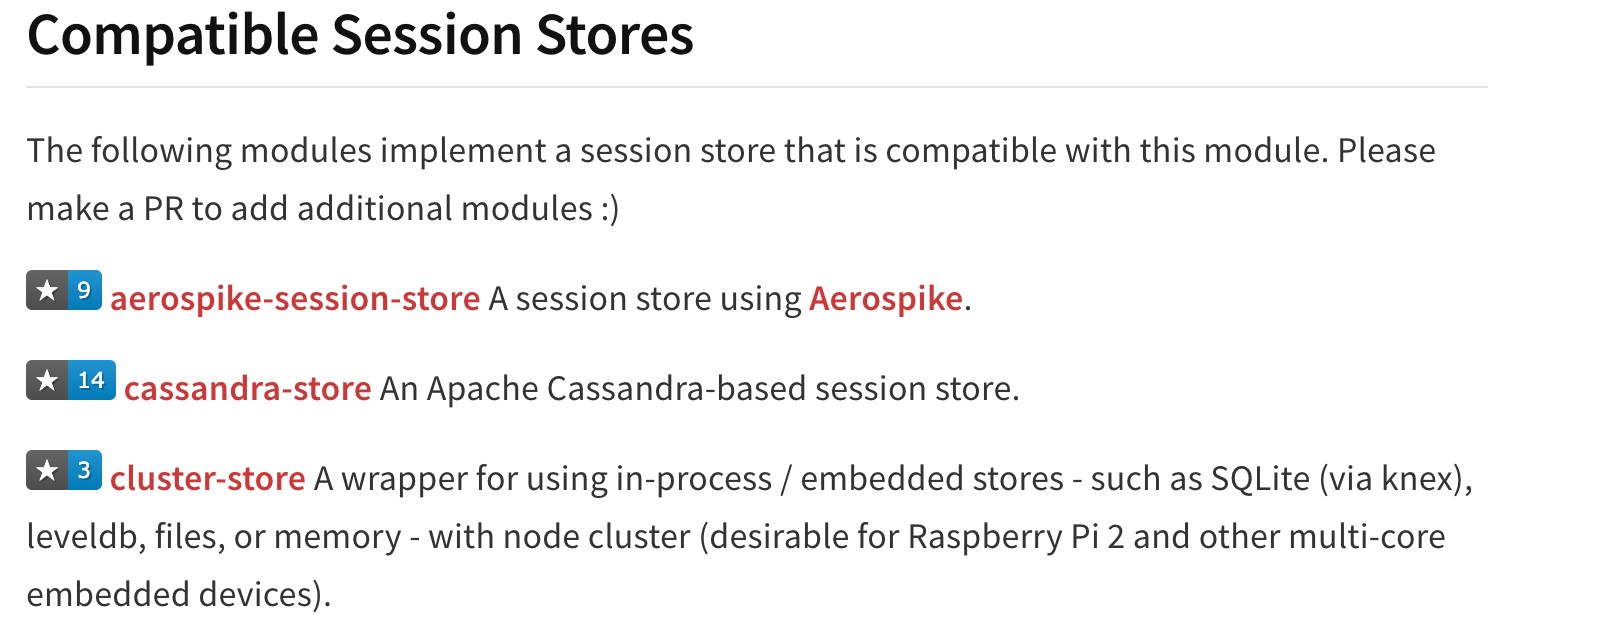
最後,如果你有引入 Session 在專案裡的話,也會需要新增一項配置屬性為 store,也就是 Session 儲存的地方,在 express-session npm 最下面可以找到很多儲存的方法。
我們選用 express-mysql-session,一樣先安裝:
$ npm install express-mysql-session --save並且引入並使用 (設置在 Session 上方):
const MySQLStore = require('express-mysql-session')(session);

const options = {
  connectionLimit: 10,
  host: 'us-cdbr-iron-east-05.cleardb.net',
  user: 'be6c96a165xxx0',
  password: 'c504fxxx',
  database: 'heroku_e8d000339887xxx'
}
const sessionStore = new MySQLStore(options);

// 此處為 session 設置
app.use(session({
  secret: 'thef2e_chatroom',
  resave: false,
  saveUninitialized: false,
  cookie: {
    maxAge: 60 * 60 * 1000 * 3,
  },
}));
報錯處理
在 APP 網站的右上角可以打開 APP (饒舌,如果看到此頁面代表有報錯。

此時可以用以下指令查詢 (使用 ctrl+c 退出):
$ heroku logs --tail更詳細的報錯可以參考延伸閱讀第一個文章。
後記
報錯的話多看終端機,看仔細點絕對會找到問題的!
以上是這次部署死都不看報錯的最大心得。
參考資料
Deploying/Hosting Node.js app on Heroku with MySQL database - BezKoder
Heroku | 搭配 Git 在 Heroku 上部署網站的手把手教學
 標籤雲
標籤雲 文章列表
文章列表