
Node.js 實作 The F2E_ChatRoom (1) 環境建置
前言
筆者最近剛接觸後端,看到很多人範例做留言板,
就想說既然要做,就來做個比較特別的!
也剛好之前在 The F2E 做過一個聊天室,不如就來正式接一次後端吧!
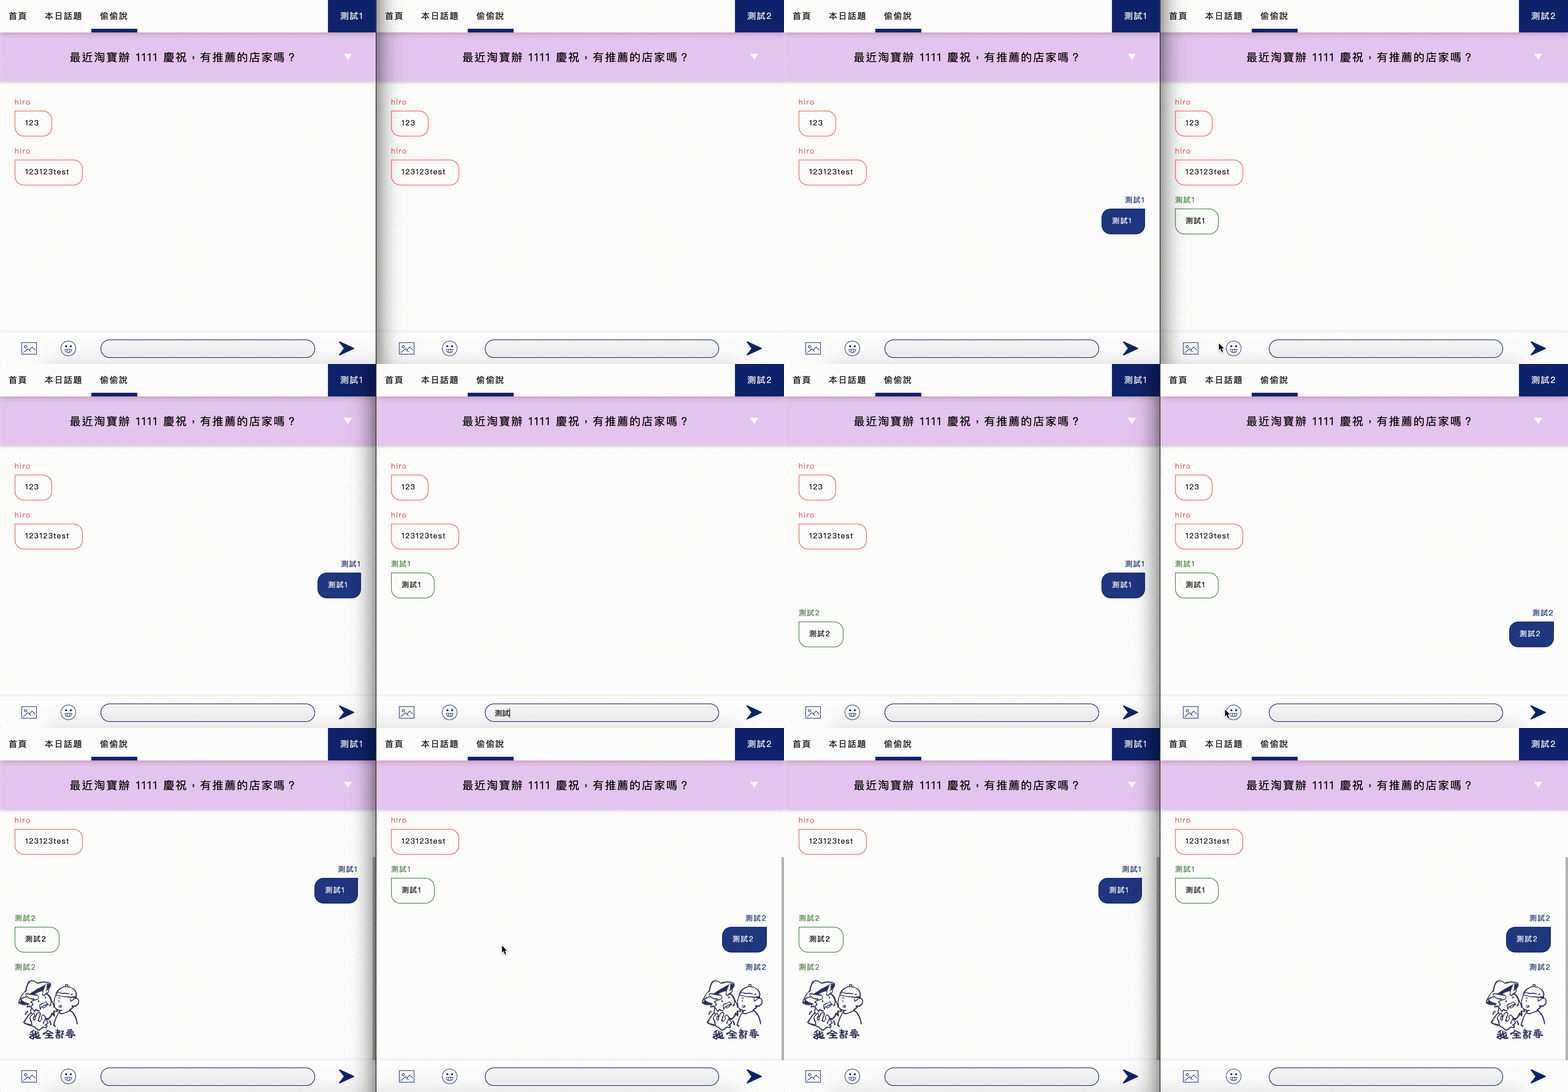
另外,本文使用 Node.js + MySQL + Socket.IO 實作,如有做錯地方歡迎討論謝謝!
User Story
不須註冊,輸入名字即可登入,並且不和線上使用者撞名。
聊天室分為每日主題與偷偷說,使用者能新增偷偷說。
我可以使用貼圖,可以上傳圖片。
本篇目錄
使用 Express 建立連線。
串接 SQL。
使用 Socket.IO 建立即時連線,傳送訊息。
建立連線
使用終端機建立資料夾並進入:
$ mkdir chatroom

$ cd chatroom
建立 package.json 檔案,輸入完點擊 ENTER 到底就可以了。
( author 地方可以輸入自己名字 )
$ npm init


This utility will walk you through creating a package.json file.
It only covers the most common items, and tries to guess sensible defaults.

See `npm help json` for definitive documentation on these fields
and exactly what they do.

Use `npm install <pkg>` afterwards to install a package and
save it as a dependency in the package.json file.

Press ^C at any time to quit.
package name: (chatroom)
version: (1.0.0)
description:
entry point: (index.js)
test command:
git repository:
keywords:
author: Hiro <[email protected]>
license: (ISC)
About to write to /Users/hiro/Desktop/chatroom/package.json:

{
  "name": "chatroom",
  "version": "1.0.0",
  "description": "",
  "main": "index.js",
  "scripts": {
    "test": "echo \"Error: no test specified\" && exit 1"
  },
  "author": "Hiro <[email protected]>",
  "license": "ISC"
}

Is this OK? (yes)
建立後,在資料夾內新增 index.js 檔案,
並且在終端機安裝 Express:
$ touch index.js

$ npm install express --save
此時,你的資料夾應該長的會是這樣:
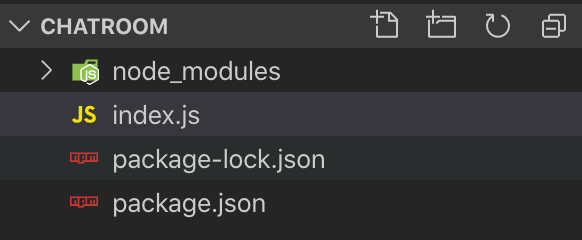
接著我們在 index.js 引入 Express,建立基礎連線:
// 引入 Express 並使用
const express = require('express');
const app = express();

app.get('/', function(req, res){
  res.send('Hello World');
});

// 監聽本地端 3000 port
const port = process.env.PORT || 3000;

app.listen(port, () => {
  console.log(`Listening on port ${port}...`);
});
最後啟動連接,在本地端 localhost:3000 有出現 Hello World 就成功了哦!
( 為了方便之後會使用 nodemon 建立連線 )
$ node index.js串接 SQL
在 SQL 上先建立一個表格:
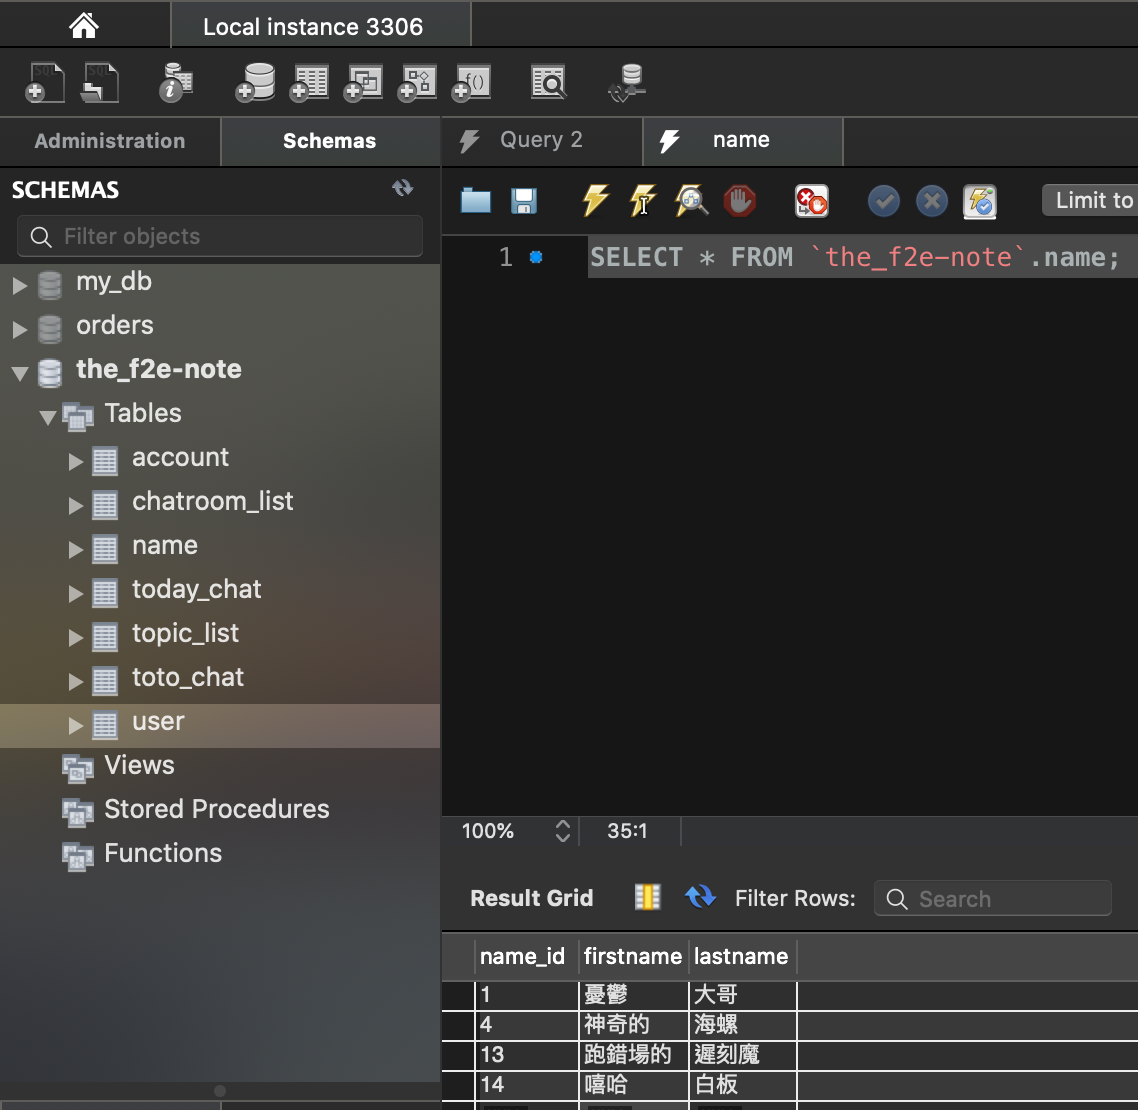
安裝好 npm 上的 MySQL:
$ npm install mysql --save再來建立個連接池,可以提高連接效率:
const mysql = require('mysql');

const pool = mysql.createPool({
connectionLimit: 10,
host: 'localhost',
user: 'root',
password: '****',
database: 'the_f2e-note'
});

// connectionLimit: 限制人數
// host: 連線主機
// user: 使用者
// password: 密碼
// database: 資料庫
建立好後,把剛剛的 get 改寫為以下,試試看連接狀態:
app.get('/', function(req, res){

  // 接上連接池
  pool.getConnection((err, connection) => {
    if (err) throw err;

    // 輸入 SQL 語法查詢
    connection.query('SELECT * FROM name ORDER BY rand() limit 1',
    (err, rows, fields) => {
      if (err) throw err;

      // 送出查詢結果
      res.send(rows);

      // 斷開連結
      connection.release();
    });

  });
});
有出現就代表連接成功了哦!
Socket.IO
再來我們的主角終於可以進場了!
Socket.IO 是個可以建立即時性溝通的網頁應用程式,傳輸方式上是使用 WebSocket,另外還增加了許多方便的 API,最後才包裝出來的!
( 可參考延伸閱讀 )
而相較於留言板,聊天室是非常需要及時性的!
因此才說到 Socket.IO 是這次的主角。
接著,我們要來試著引入 Socket.IO:
$ npm install socket.io --save把之前的監聽路由改為以下:
// app.listen(port, () => {
//   console.log(`Listening on port ${port}...`);
// });

const server = require('http').Server(app).listen(port, () => {
  console.log(`Listening on port ${port}...`);
});

const io = require('socket.io')(server);
加入 Socket.IO 監聽連線,
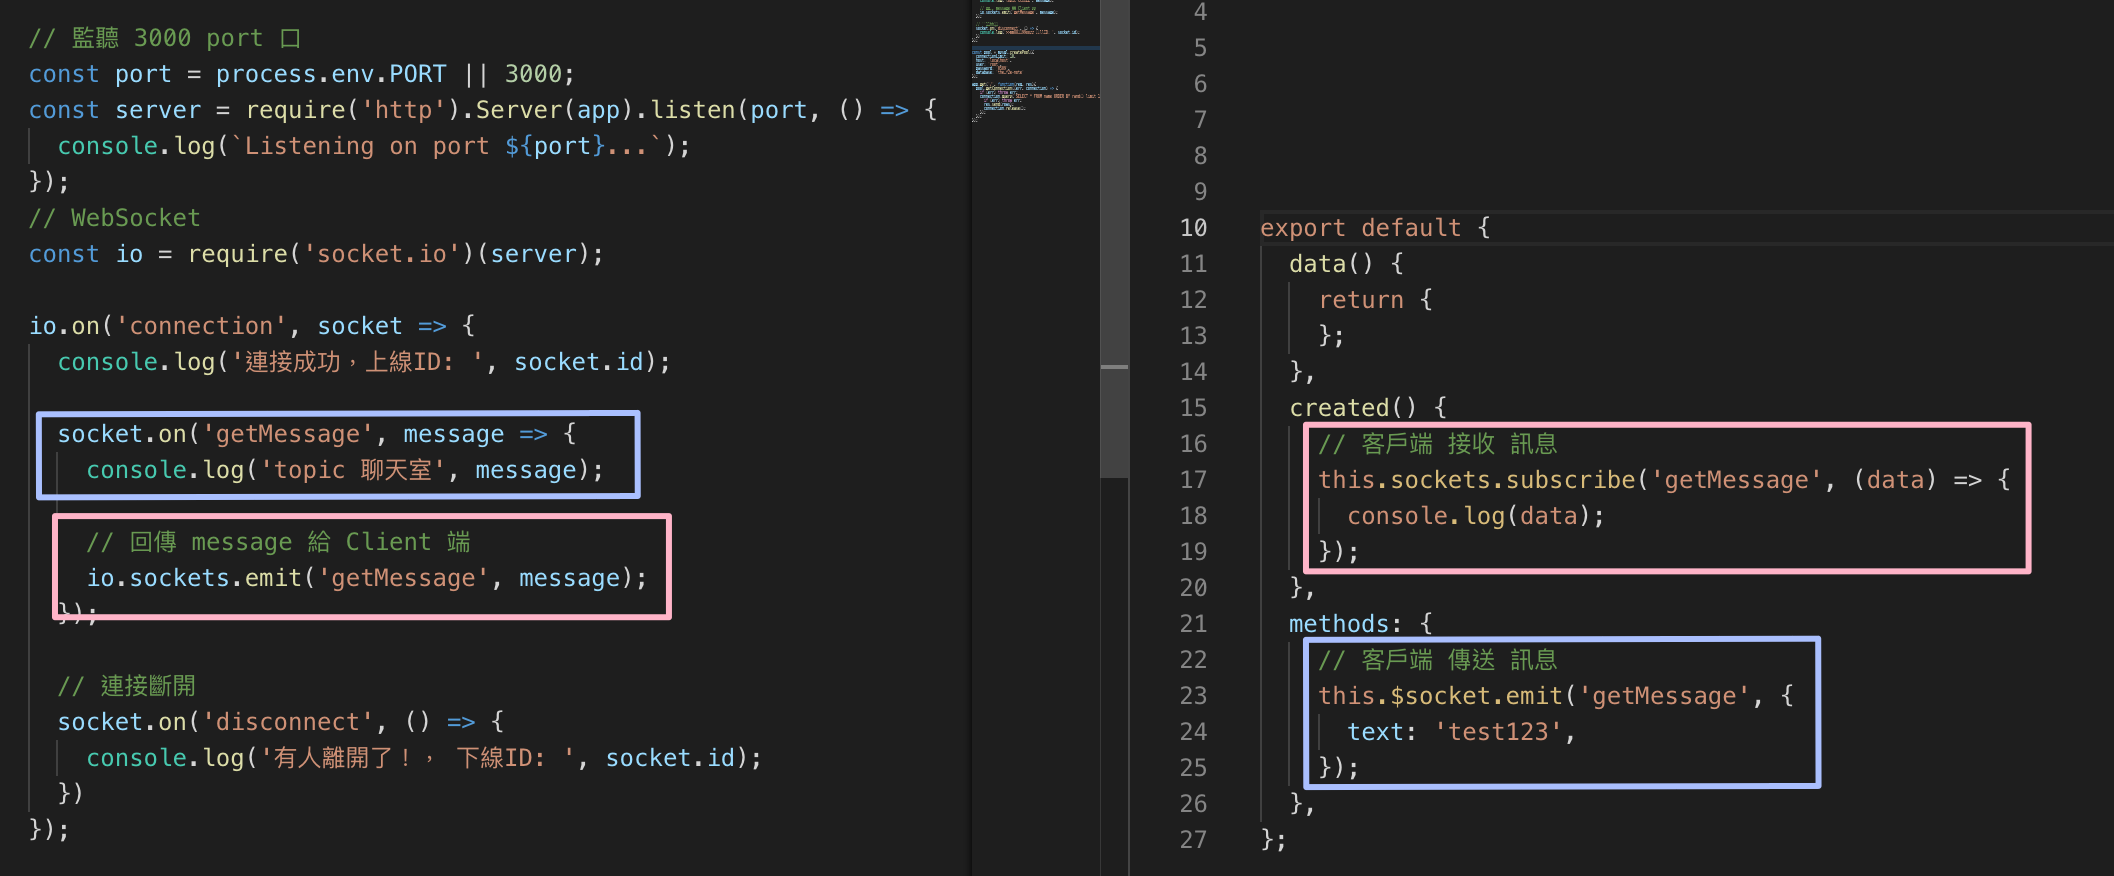
getMessage 的地方可自由變更,但要和前端做搭配,會在下方做補充說明!
io.on('connection', socket => {
  console.log('連接成功,上線ID: ', socket.id);

  // 監聽訊息
  socket.on('getMessage', message => {
    console.log('服務端 接收 訊息: ', message);

    //回傳 message 給客戶端
    socket.emit('getMessage', message);
  });

  // 連接斷開
  socket.on('disconnect', () => {
    console.log('有人離開了!, 下線ID: ', socket.id);
  });
});
現在服務端完成監聽連線了!
但…我們還需要客戶端來配合,所以在這邊會開始加入前端部分。
一般會使用 socket.io-client,但剛好之前實作前端是使用 Vue 框架的關係,
這次前端使用的套件會是 vue-socket.io。
照著步驟一樣先安裝:
$ npm install vue-socket.io --save在 main.js 檔引入套件並使用:
import VueSocketIO from 'vue-socket.io';

Vue.use(new VueSocketIO({
  debug: true,
  connection: 'http://localhost:3000',
}))
接著連線客戶端 8080 (前端)與 3000 (後端),
8080 在 console 中會看到 vue-socket.io 的 debug 訊息:
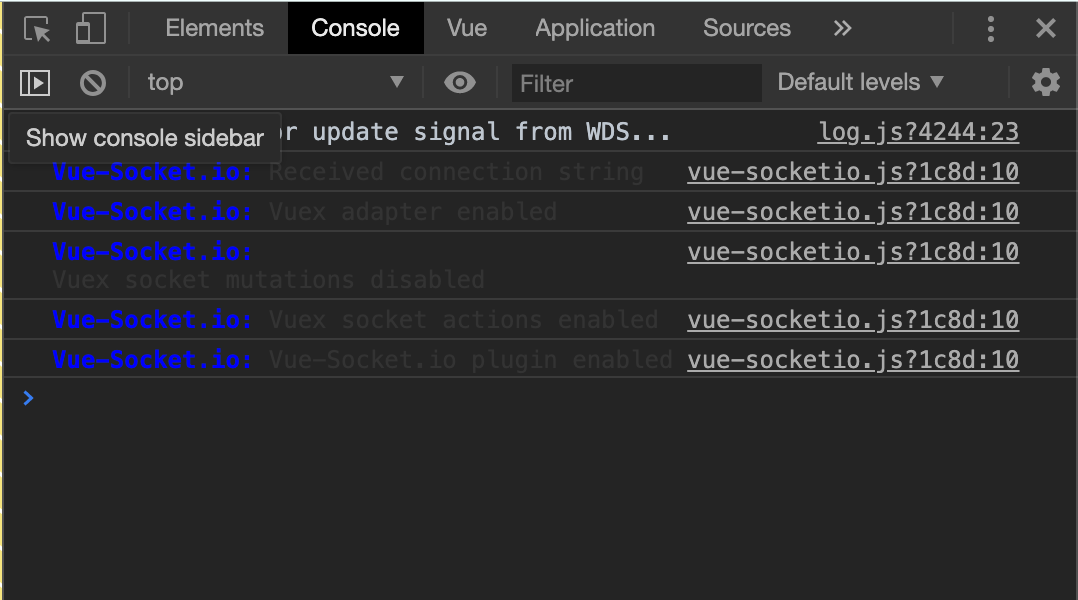
3000 的終端機上則會看到:

另外在 Socket.IO 上得默認機制為每 25 秒客戶端會發送一次 ping,服務端回復一次 pong,如果 60 秒內都沒收到 ping 的話,就會自動斷線。所以網頁掛一段時間,會看到客戶端重新連接 (下線又上線)。
接下來,要開始試做傳送訊息!
首先我們 客戶端 (前端) 要做一個雙向綁定:
export default {
  data() {
    return {
    };
  },
  created() {
    // 客戶端 接收 訊息
    this.sockets.subscribe('getMessage', (data) => {
      console.log(data);
    });
  },
  methods: {
    // 客戶端 傳送 訊息
    this.$socket.emit('getMessage', {
      text: 'test123',
    });
  },
};
剛剛說的 getMessage,就像是下圖這樣綁定的,
以此方式,就能做出不同房間個別傳送訊息!
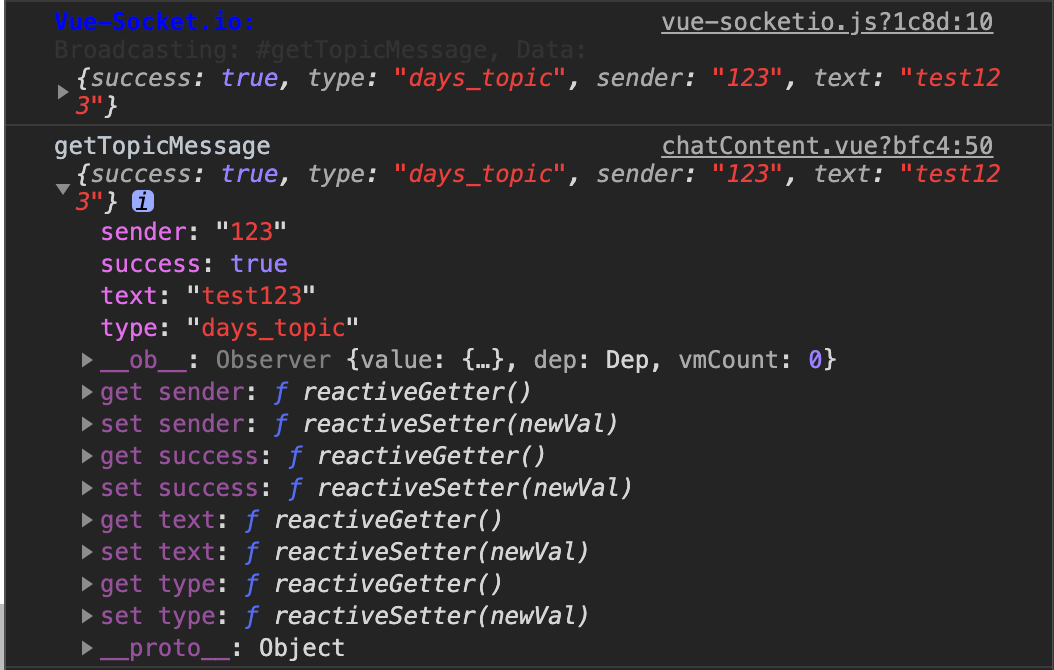
傳送出去後,就可以看到 console 顯示了,
試著傳送不同的訊息吧!

另外,官方還提供了不同的傳送訊息方式,
分組傳送可以參考延伸閱讀。
// 只回傳給發送訊息的客戶端
socket.emit('getMessage', {
  text: 'test123',
});

// 除了自己之外的所有客戶端
socket.broadcast.emit('getMessage', {
  text: 'test123',
});

// 傳給所有客戶端
io.sockets.emit('getMessage', {
  text: 'test123',
}); 標籤雲
標籤雲 文章列表
文章列表