Google 登入 SDK 環境建置 + 初始化
最近接了一個案子,網頁中想加入 Facebook 及 Google 第三方登入,於是前前後後研究了快一個禮拜有…
其中踩了不少坑,因此寫篇文章以防以後忘記可以回顧。
( 關於 FaceBook 的話,跟 Google 的作法基本上是一樣的!
FB官方文件也翻譯的較完全,這邊就只介紹 Google 了。
有興趣的人也可以看看參考資料 )
1. 環境建置
因為在不是 HTTPS 的環境下,是無法使用 Google Sing-In SDK 的。
所以第一部我們必須先在 localhost 上建置 HTTPS,
其中使用 mkcert 可以幫助我們快速建置好環境。
a. 安裝 mkcert ( macOS )
打開終端機並按照順序輸入以下指令(不包括$)
 $ brew install mkcert
 $ brew install
b. 安裝完後輸入以下指令及 sudo 密碼
mkcert 會自動產生自己專用的 CA ( Certificate Authority ) 證書,
並顯示出證書位置在下面
 $ mkcert -install

 Created a new local CA at “/Users/filippo/Library/Application Support/mkcert”
 The local CA is now installed in the system trust store! ⚡️
 The local CA is now installed in the Firefox trust store (requires restart)! 🦊
c. 接著輸入想要測試的域名
mkcert 會在 “目前的路徑” 產生出要使用的憑證及金鑰,這邊我是先進到 CA 證書的路徑才輸入指令,如果想在別的路徑產生的話,請忽略第一行 cd 語法。
 $ cd /Users/filippo/Library/Application Support/mkcert

 $ mkcert [example.com](http://example.com) localhost 127.0.0.1

 The certificate is at “./example.com+2.pem” and the key at “./example.com+2-key.pem” ✅
到這邊完成後,我們就可以開始使用證書摟!
d. 開啟使用 SSL 證書設定
這邊是使用 VS code 的外掛 Live Server 做範例!
( 如果想使用 webpack-dev-server 可以看看下方參考資料 )
首先到設定並找到 Liver Server 下的 HTTPS,
點選 setting jason ,並輸入以下設定:
“liveServer.settings.https”: {
  “enable”: true,
  “cert”: “/Users/YOUR NAME/Library/Application Support/mkcert/localhost+2.pem”,
  “key”: “/Users/YOUR NAME/Library/Application Support/mkcert/localhost+2-key.pem”,
  “passphrase”: “12345”
}

// enable: 使用 Https 為 true
// cert: 在 c 步驟產生憑證的“絕對路徑”
// key: 鑰匙
輸入完後再使用 Live Server 連上本地端,
並把 127.0.0.1 改成 localhost 就會出現鎖摟!

到這邊環境建置就 ok 了,大家掰掰!(喂
2. Google Sign in SDK
好啦,接著先來使用 Google 第三方登入!
先附上連結: Google Sign-In for WebSites
a. 建立新的 Google 專案
進去後點選 Get Started 並照著步驟申請一個新的專案,
再把官方文件上的此段複製到專案上,
並把 google-signin-client_id 此部分改成自己專屬 client ID
小提醒一下,官方有提到不要直接把 profile.getId() 取到的 ID 送去你的後端,請使用下方加密過的 id_token !
<html lang="en">
  <head>
    <meta name="google-signin-scope" content="profile email">
    <meta name="google-signin-client_id" content="YOUR_CLIENT_ID.apps.googleusercontent.com">
    <script src="https://apis.google.com/js/platform.js" async defer></script>
  </head>
  <body>
    <div class="g-signin2" data-onsuccess="onSignIn" data-theme="dark"></div>
    <script>
      function onSignIn(googleUser) {
        // Useful data for your client-side scripts:
        var profile = googleUser.getBasicProfile();
        console.log("ID: " + profile.getId()); // Don't send this directly to your server!
        console.log('Full Name: ' + profile.getName());
        console.log('Given Name: ' + profile.getGivenName());
        console.log('Family Name: ' + profile.getFamilyName());
        console.log("Image URL: " + profile.getImageUrl());
        console.log("Email: " + profile.getEmail());

        // The ID token you need to pass to your backend:
        var id_token = googleUser.getAuthResponse().id_token;
        console.log("ID Token: " + id_token);
      }
    </script>
  </body>
</html>
咦! 你問我自己的 ID 在哪嗎?
當然是要先進到 Google 的控制台啦!
連結附上: Google Developers
這邊我們也順便做好一些設定吧!
b. 相關設定
進到控制台並點選憑證,可以看到有兩個 ID
而我是使用下方的 Web client
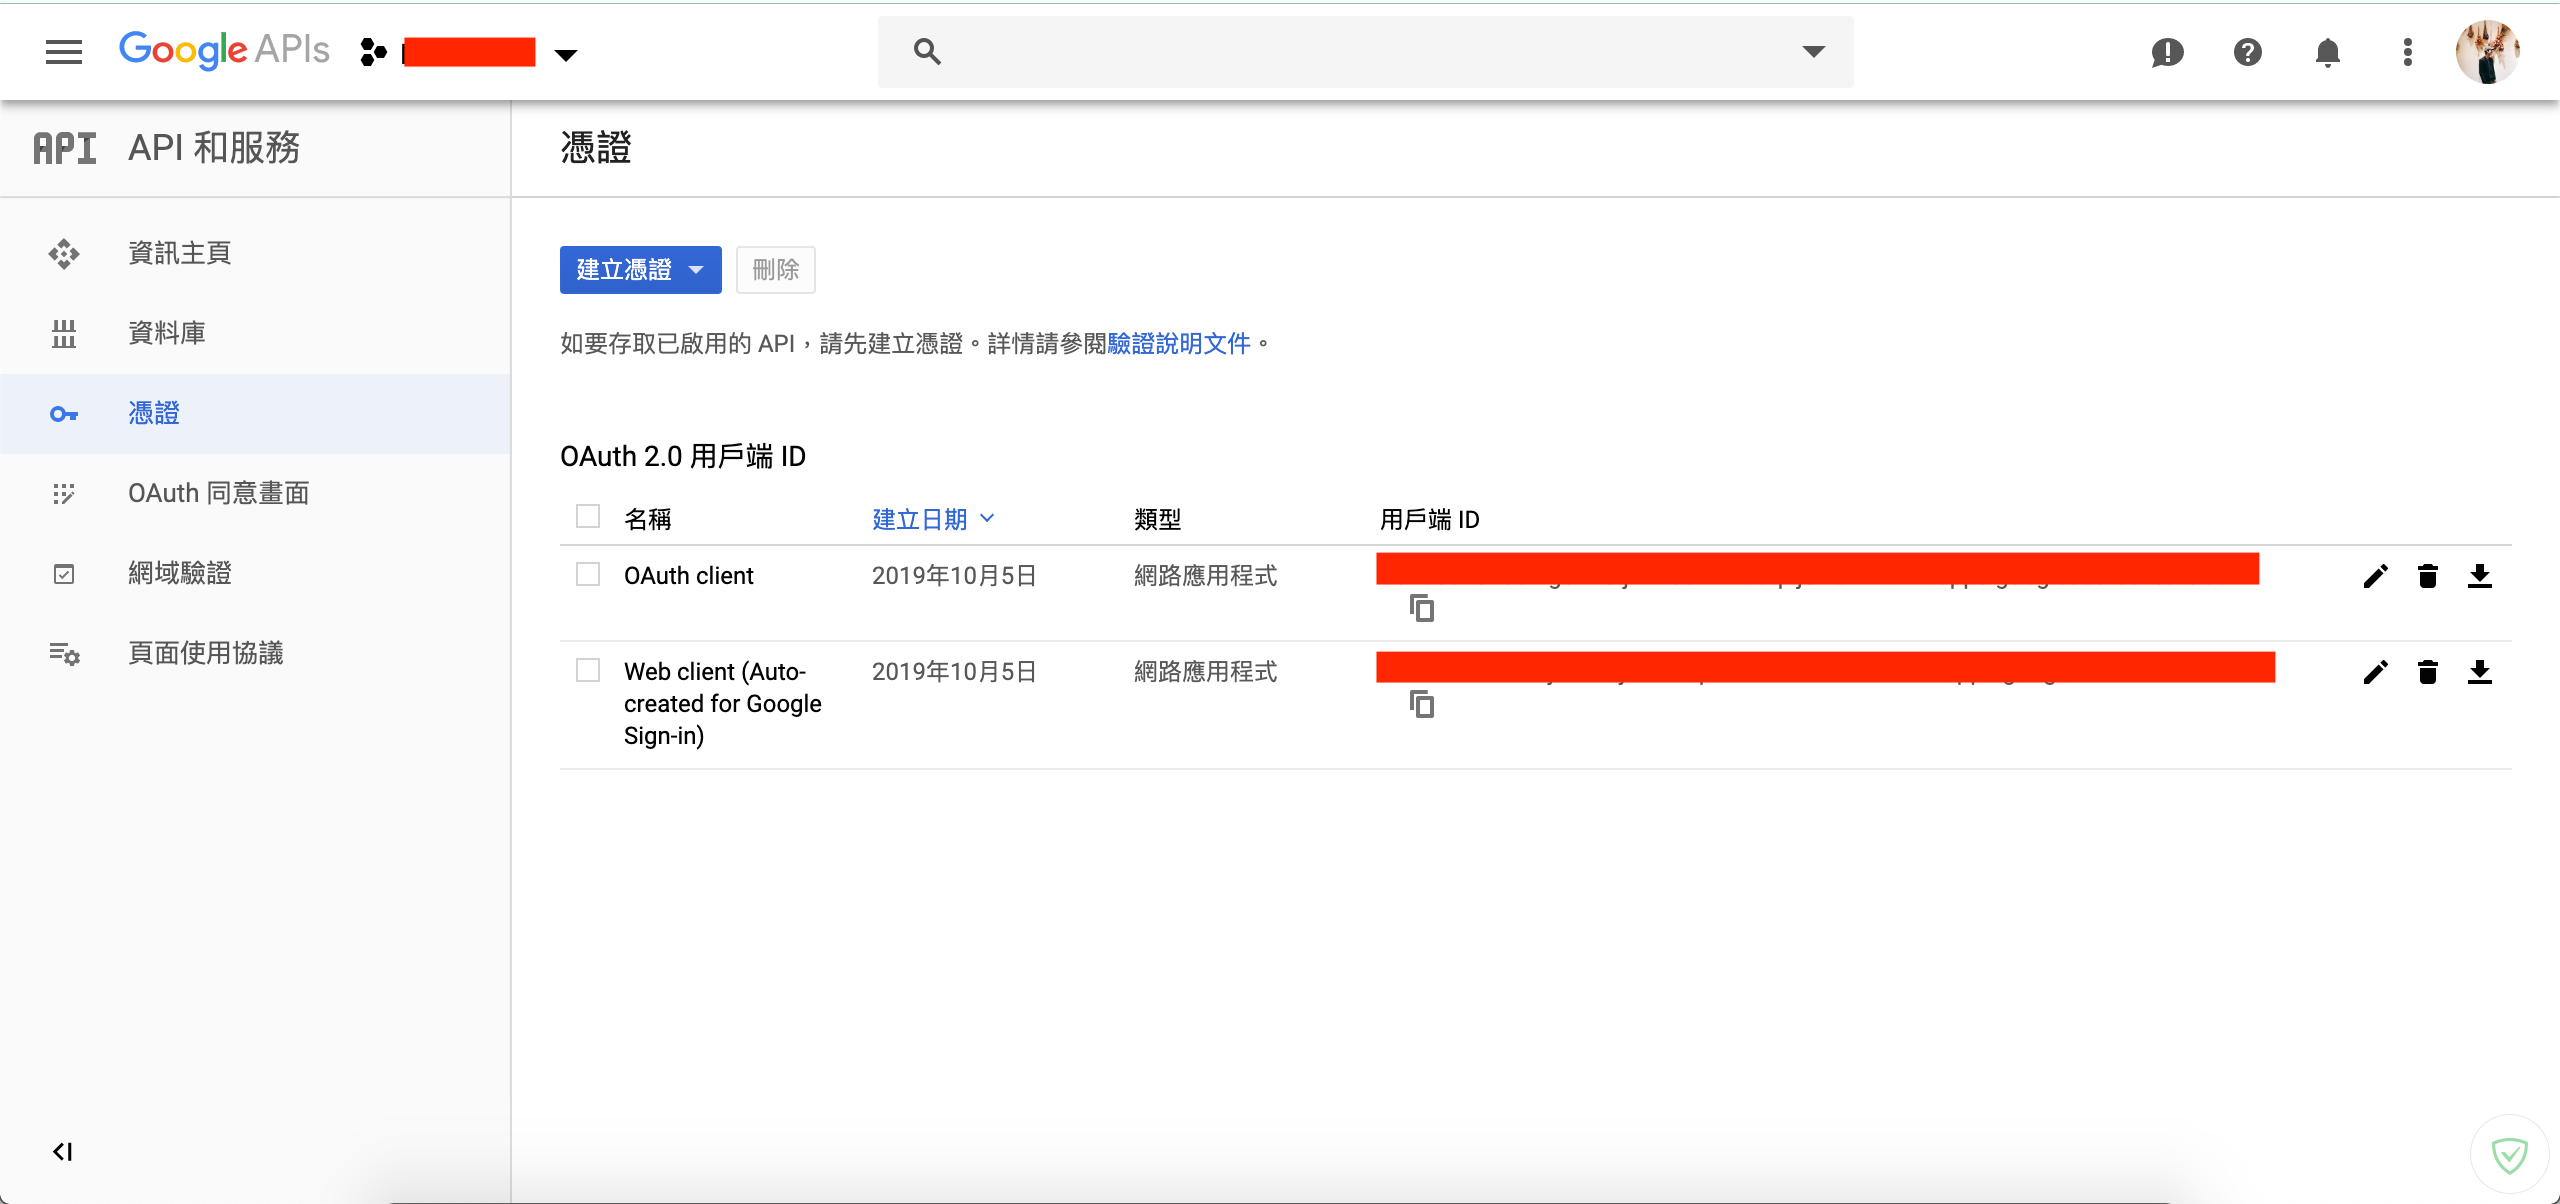
複製貼上到專案後,點選編輯鈕進入編輯頁面,
並再已授權的 JavaScript 來源裡,新增 localhost 或是加上 port 端

接著就完成啦,還不趕緊到專案裡試試看!
後記
在這次使用上我發現使用 Google 登入過後,第二次點選登入他竟然會直接取用 cookies 的資料,導致不能再次輸入密碼或是選擇其他用戶。
這時候可以在 Google Button 上多加一樣 data-prompt 設定就好啦!
詳細設定可以參考官方說明文件中的 Reference
<div class="g-signin2" data-onsuccess="onSignIn"
  data-theme="dark" data-prompt="select_account">
</div>
參考資料:
mkcert: valid HTTPS certificates for localhost
[推薦] 快速產生本地端開發用SSL憑證工具-mkcert | 辛比誌
[Google Sign-In for Websites] 整合Google帳號登入 Javascript SDK 的使用方式
 標籤雲
標籤雲 文章列表
文章列表